Etiqueta: minecraft bedrock

  • How to Download Alex’s Caves Addon for Bedrock 1.21

    How to Download Alex’s Caves Addon for Bedrock 1.21

    How to Download Alex’s Caves Addon for Bedrock 1.21

    Are you ready to explore the deepest, most exciting caves in Minecraft Bedrock 1.21? If you’re looking to enhance your underground adventures, Alex’s Caves Addon is the perfect tool for the job. This addon brings a host of new features to Minecraft’s caves, making them more dynamic and filled with surprises. From new ores to hidden structures, Alex’s Caves will completely change how you experience the underground. In this guide, we’ll show you exactly how to download and install this addon in your Minecraft Bedrock world.

    What Is Alex’s Caves Addon?

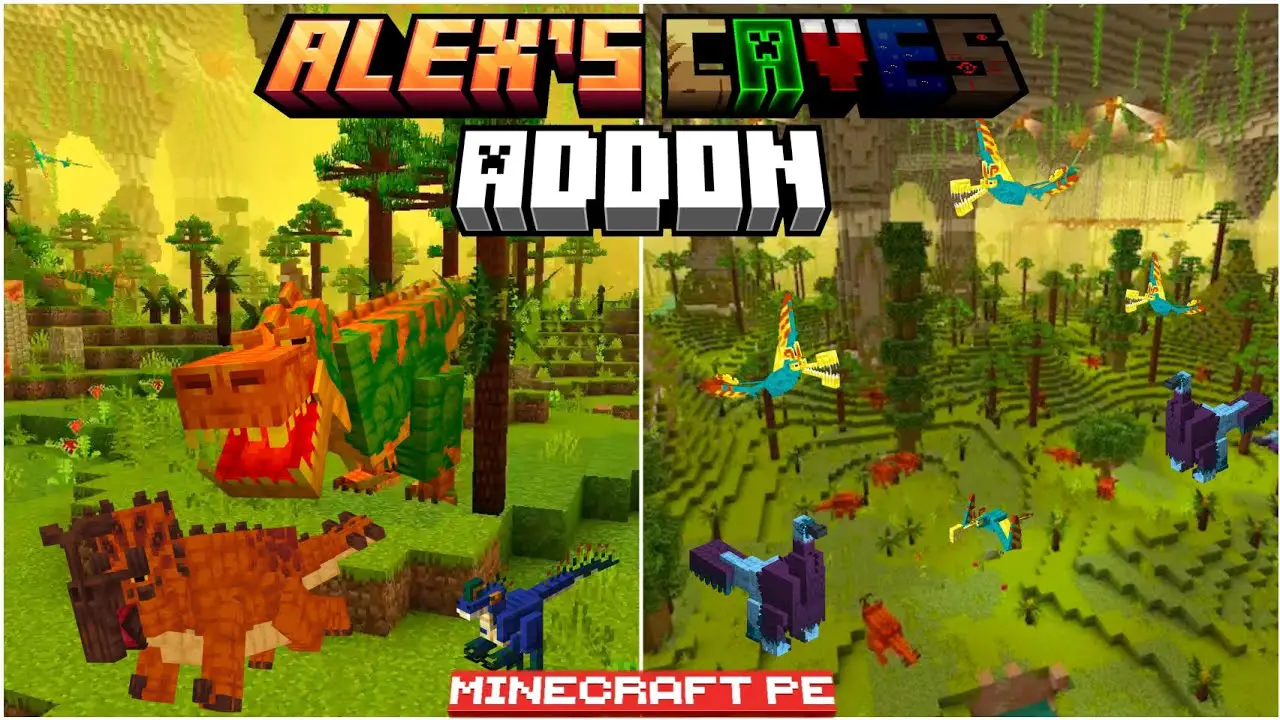
    Alex’s Caves Addon is an exciting modification for Minecraft Bedrock 1.21 that enhances the cave exploration experience. The addon adds new cave biomes, ores, mobs, and structures, making the underground world feel more alive and adventurous. Whether you’re an experienced miner or a newcomer to Minecraft, this addon offers something for everyone.

    Key features of Alex’s Caves Addon include:

    • New cave biomes with unique features and aesthetics.
    • Additional ores and items for players to discover.
    • Exciting new mobs that make cave exploration even more thrilling.

    With the added variety and challenges, Alex’s Caves ensures that no two cave expeditions will ever be the same. Let’s take a look at how you can download and install this fantastic addon.

    Step-by-Step Guide to Download Alex’s Caves Addon

    Follow these simple steps to download Alex’s Caves Addon for Minecraft Bedrock 1.21:

    1. Download the Addon

    The first step in installing the addon is to download the file. Visit the official download page for Alex’s Caves Addon on MCPEDL:

    Once you’re on the page, click the download link provided. You’ll be directed to a page where you can either download the addon file directly or use an external site for the download.

    THE BEST MINECRAFT COMMUNITY?

    ¡Join to MINECOMUNIDAD.COM  DISCORD! (Mods, Shaders, Servers, Etc)

    ¡Join now!

    2. Import the Addon into Minecraft

    After downloading the file, you’ll need to import it into your Minecraft game. Here’s how to do that:

    1. Open Minecraft Bedrock 1.21 and go to the Settings menu.
    2. Navigate to the Storage section and click on Import.
    3. Locate the downloaded Alex’s Caves Addon file (it will usually be in your Downloads folder) and select it.
    4. The addon will be imported into the game, and you will be able to see it in your available packs.

    3. Apply the Addon to Your World

    Now that the addon is imported, it’s time to apply it to your world:

    1. Create a new world or select an existing world.
    2. In the world settings, go to the Behavior Packs section.
    3. Select the Alex’s Caves Addon and click Activate.
    4. Do the same in the Resource Packs section if required.
    5. After applying the addon, click Create or Play to start your world with the new features.

    4. Start Exploring the New Caves

    Once you’ve activated the addon, it’s time to explore the new caves! Head underground and see what exciting features Alex’s Caves Addon has added. From new ores to dangerous mobs, every cave will feel fresh and exciting.

    How to Deactivate Alex’s Caves Addon

    If you ever want to deactivate Alex’s Caves Addon and go back to the default Minecraft caves, it’s simple:

    1. Open your world settings and go to the Behavior Packs section.
    2. Deselect the Alex’s Caves Addon.
    3. Save the changes and restart the game.

    The addon will be removed from your world, and you’ll return to the standard cave systems.

    Why Should You Use Alex’s Caves Addon?

    Alex’s Caves Addon is a must-have for any Minecraft Bedrock 1.21 player who loves exploring the underground. It revitalizes the cave system, adding new challenges, rewards, and surprises. With more biomes, ores, and mobs, your Minecraft experience will be much richer and more diverse. Whether you’re looking to find new resources, fight new creatures, or simply enjoy the visual improvements, this addon is sure to make your gameplay even more enjoyable.

    Conclusion

    Now that you know how to download and install Alex’s Caves Addon for Minecraft Bedrock 1.21, it’s time to dive into the depths and experience a whole new world beneath your feet. Don’t forget to visit Alex’s Caves Addon Page for the download link and start your adventure today. Happy mining!

  • Top Best Addons for Bedrock 1.21

    Top Best Addons for Bedrock 1.21

    Top Best Addons for Bedrock 1.21

    Are you looking for the Top Best Addons for Bedrock 1.21 to enhance your Minecraft experience? If so, you’re in the right place! Minecraft’s Bedrock Edition continues to evolve, and with the help of some incredible addons, your gameplay can be transformed. From new mobs to enhanced mechanics, the right addons can open up endless possibilities. In this article, we’ll walk you through the top addons you should consider adding to your world.

    1. Alex’s Mobs

    One of the most exciting and popular addons for Minecraft Bedrock 1.21 is Alex’s Mobs. This addon introduces a wide array of new creatures to the game. From majestic wolves to massive aquatic monsters, Alex’s Mobs brings a new dimension to your adventures. The variety of mobs is incredible, and each one has unique behaviors that make the world feel even more alive. Whether you’re an explorer or a hunter, this addon is perfect for those who want more wildlife in their Minecraft world.

    • How to Activate: Download the addon from Alex’s Mobs, then import it into your world settings under Add-ons.
    • How to Deactivate: Simply go to the Add-ons section and turn off the mob pack when needed.

    2. Alex’s Cave

    For those who love exploring the depths of Minecraft, Alex’s Cave addon is a must-have. This addon enhances the cave systems, adding new ores, structures, and creatures to the underground. The new cave generation makes mining and exploring more exciting, and the extra loot and mobs add a thrilling twist to your adventures beneath the surface.

    • How to Activate: Download from Alex’s Cave, then activate it via your Minecraft Bedrock settings.
    • How to Deactivate: Go to the world settings and deactivate the addon by toggling it off in the Add-ons section.

    3. Age of Berk 2

    Age of Berk 2 brings a mythical world to Minecraft, inspired by the How to Train Your Dragon franchise. This addon allows players to tame, train, and ride dragons, transforming your Minecraft experience into an epic dragon-filled adventure. With new mobs, structures, and more, Age of Berk 2 takes you into a completely different realm filled with exciting challenges and rewards.

    • How to Activate: Head to Age of Berk 2 and download the addon. Then, load it into your world.
    • How to Deactivate: Deactivate this addon through your Add-ons menu in Minecraft settings.

    4. Raiyon’s Tree Capitator Addon

    If you’ve ever wished for a quicker way to chop down trees, Raiyon’s Tree Capitator Addon is the solution! With this addon, you can chop an entire tree down with a single strike, making it super easy to collect wood without spending too much time. This addon is perfect for players who love building and need a fast and efficient way to gather resources.

    • How to Activate: Download Raiyon’s Tree Capitator from here, then enable it in your Minecraft world settings.
    • How to Deactivate: To deactivate, simply toggle it off from the Add-ons section in the settings.

    5. Mhafy’s Ship Addon

    Set sail with Mhafy’s Ship Addon, which adds working ships to your Minecraft world. You can now explore the oceans in style with realistic ship models that you can actually control. Whether you want to navigate the seas or build a floating fortress, this addon brings a fresh new way to explore the vast oceans of Minecraft.

    • How to Activate: Download from Mhafy’s Ship, and import it into your world’s settings.
    • How to Deactivate: Turn it off via the Add-ons section in the game settings when you no longer want to use it.

    THE BEST MINECRAFT COMMUNITY?

    ¡Join to MINECOMUNIDAD.COM  DISCORD! (Mods, Shaders, Servers, Etc)

    ¡Join now!

    Why Addons Are Essential for Minecraft Bedrock 1.21

    Minecraft Bedrock Edition is already packed with features, but with the best addons, you can take your gaming experience to a whole new level. Addons in Minecraft are customizations that allow you to modify the game’s mechanics, introduce new features, or even create entirely new game modes. With Minecraft addons 1.21, you can significantly enhance the visuals, gameplay mechanics, and even expand the world with new creatures and features.

    But how do you know which addons are worth your time? We’ve carefully selected the Top Best Addons for Bedrock 1.21 that offer not only quality and performance but also enrich your gaming experience. Let’s dive in!

    How to Install Addons in Minecraft Bedrock 1.21

    Adding these Top Best Addons for Bedrock 1.21 is a breeze. Here’s how to install them:

    1. Download the Addon: Click on the provided download links to get the addon file.
    2. Import the Addon: Open Minecraft, go to Settings, and then Storage. Select Import and find the downloaded addon.
    3. Activate the Addon: Go to your world settings and find the Behavior Packs or Resource Packs section. Enable the addon to apply it to your world.
    4. Play and Enjoy: Once activated, the changes will take effect, and you can begin using the new features in your world.

    How to Deactivate Addons

    If you ever want to remove an addon, it’s as easy as toggling it off:

    1. Go to Settings: Open the game and go to Settings.
    2. Disable the Addon: Under Behavior Packs or Resource Packs, uncheck the addon you want to disable.
    3. Restart the Game: Restart your world to ensure the addon is removed.

    Conclusion: Why These Addons Are a Must-Have

    In conclusion, the Top Best Addons for Bedrock 1.21 are fantastic ways to enhance your Minecraft experience. Whether you’re looking for new mobs, improved cave systems, or quicker ways to gather resources, these addons are sure to improve your gameplay. Try them all, and see which ones transform your Minecraft adventures into something even more exciting!

    Don’t forget to download the addons from the provided links, and start enjoying the enhanced features today!

  • HOW TO DOWNLOAD AND INSTALL NEW DRAGONS ADDON for BEDROCK 1.21 

    HOW TO DOWNLOAD AND INSTALL NEW DRAGONS ADDON for BEDROCK 1.21 

    HOW TO DOWNLOAD AND INSTALL NEW DRAGONS ADDON for BEDROCK 1.21

    If you’ve ever dreamed of riding majestic dragons in Minecraft Bedrock 1.21, the New Dragons Addon makes it possible. This addon is perfect for players who want to add mythical creatures to their game and explore the skies in style. But how do you download and install it? Keep reading to learn everything you need to know, including how to activate and deactivate it easily.

    What is the New Dragons Addon?

    The New Dragons Addon for Minecraft Bedrock 1.21 introduces several new types of dragons that players can tame, ride, and even use in battles. These dragons come with unique abilities and designs, making your Minecraft world more exciting than ever.

    Why Use the New Dragons Addon?

    Adding dragons to Minecraft enhances your gameplay by providing:

    • New Exploration Opportunities: Travel faster and reach previously unreachable areas.
    • Exciting Battles: Use your dragon’s special abilities to fend off enemies.
    • Aesthetic Appeal: The detailed dragon models make your world look epic.

    How to Download the New Dragons Addon

    Downloading the addon is simple, but make sure you follow these steps carefully to avoid errors.

    Step 1: Download the Addon Files

    Use the following links to download the New Dragons Addon:

    Click on the links and download the files to your device. The addon usually comes in .mcaddon format, which is compatible with Minecraft Bedrock.

    THE BEST MINECRAFT COMMUNITY?

    ¡Join to MINECOMUNIDAD.COM  DISCORD! (Mods, Shaders, Servers, Etc)

    ¡Join now!

    Step 2: Locate the Files

    Once downloaded, locate the .mcaddon file in your device’s downloads folder. If the file is compressed, extract it using any file manager app.

    How to Install the New Dragons Addon

    Step 1: Import the Addon into Minecraft

    1. Open the .mcaddon file by clicking on it.
    2. This will automatically launch Minecraft Bedrock, and the addon will be imported.
    3. Wait for the “Successfully Imported” message to appear on your screen.

    Step 2: Activate the Addon in a World

    1. Open Minecraft and create a new world or edit an existing one.
    2. Go to Behavior Packs and Resource Packs in the world settings.
    3. Look for the New Dragons Addon under “My Packs.”
    4. Click “Activate” to enable the addon.
    5. Make sure Experimental Features like «Holiday Creator Features» and «Custom Biomes» are toggled on.

    Step 3: Load Your World

    Once activated, load your world and look for dragons in specific biomes or spawn them using eggs in Creative Mode.

    How to Deactivate or Remove the Addon

    If you ever want to remove the addon, follow these steps:

    1. Go to the world settings of the world where the addon is active.
    2. Under Behavior Packs and Resource Packs, click “Deactivate” next to the New Dragons Addon.
    3. If you wish to uninstall the addon entirely, delete the files from your Minecraft storage by navigating to Settings > Storage > Behavior Packs/Resource Packs and removing it.

    Common Issues and How to Fix Them

    Addon Not Importing Correctly

    If the .mcaddon file doesn’t import, make sure:

    • You are using Minecraft Bedrock 1.21.
    • The file isn’t corrupted. Re-download if necessary.

    Dragons Not Appearing

    If dragons don’t appear in your game:

    • Check that Experimental Features are enabled.
    • Ensure the addon is active in both Behavior Packs and Resource Packs.
    • Restart Minecraft and reload the world.

    Final Thoughts

    The New Dragons Addon for Bedrock 1.21 is a fantastic way to elevate your Minecraft experience. By following the steps outlined above, you’ll be flying high in no time. Remember to always enable experimental features and double-check your settings to ensure the addon works perfectly.

    So, what are you waiting for? Download the addon today and bring dragons into your Minecraft world!

  • THE TRAVELER’S BACKPACK ADDON for BEDROCK 1.21

    THE TRAVELER’S BACKPACK ADDON for BEDROCK 1.21

    THE TRAVELER’S BACKPACK ADDON for BEDROCK 1.21

    Are you tired of running out of inventory space while exploring in Minecraft Bedrock 1.21? THE TRAVELER’S BACKPACK ADDON for BEDROCK 1.21 is here to solve your problems! This addon brings a game-changing feature to Minecraft that every adventurer will love. But how does it work, and why is it so popular? Keep reading to find out everything you need to know about this addon.

    What is THE TRAVELER’S BACKPACK ADDON for BEDROCK 1.21?

    THE TRAVELER’S BACKPACK ADDON is an innovative Minecraft addon designed to expand your inventory in a convenient and stylish way. Inspired by the classic backpack mods from Java Edition, this addon is tailored for Bedrock players in version 1.21. Whether you’re a seasoned adventurer or a casual player, this addon will enhance your gameplay by allowing you to carry more items while exploring the vast Minecraft worlds.

    Key Features of THE TRAVELER’S BACKPACK ADDON

    Expanded Inventory

    With this addon, you gain access to a fully functional backpack that acts as portable storage. It offers extra slots to store items and tools, making long journeys much more manageable.

    Easy Crafting Recipe

    Crafting the backpack is simple. All you need are a few basic resources:

    • Leather
    • Iron Ingot
    • String Once you gather these items, you can craft the backpack directly in your crafting table.

    Functional Design

    The backpack isn’t just for storage; it also acts as a crafting table on the go. You can easily switch between storage and crafting modes without needing to place any blocks.

    Customization Options

    Choose from a variety of backpack designs that match your playstyle or the theme of your adventure. Whether you’re trekking through jungles, deserts, or caves, there’s a design for you.

    How to Download and Install THE TRAVELER’S BACKPACK ADDON for BEDROCK 1.21

    Installing the addon is straightforward. Follow these steps to get started:

    1. Download the addon: Use this link to download the .mcaddon file.
    2. Open the file: Locate the downloaded file on your device and tap on it. This will automatically open Minecraft and import the addon.
    3. Activate the addon:
      • Go to the main menu of Minecraft Bedrock.
      • Open “Settings” and select your world.
      • Scroll down to the “Behavior Packs” and “Resource Packs” sections.
      • Select THE TRAVELER’S BACKPACK ADDON and click “Activate.”
    4. Restart the game: Close and reopen Minecraft to ensure the addon is properly loaded.

    Now you’re ready to enjoy all the features of THE TRAVELER’S BACKPACK ADDON!

    THE BEST MINECRAFT COMMUNITY?

    ¡Join to MINECOMUNIDAD.COM  DISCORD! (Mods, Shaders, Servers, Etc)

    ¡Join now!

    How to Use THE TRAVELER’S BACKPACK ADDON

    Activating the Backpack

    Once the addon is installed, you’ll need to craft the backpack using the recipe mentioned earlier. After crafting it, place it in your hotbar and equip it. The backpack will automatically add storage slots to your inventory.

    Accessing the Storage and Crafting Features

    Right-click (or tap, depending on your platform) while holding the backpack to open the inventory. Here, you’ll find:

    • Extra storage slots
    • A crafting grid Switch between these modes using the provided buttons in the interface.

    Removing the Backpack

    To remove the backpack, simply unequip it and store it in your inventory or a chest. Make sure to empty its contents before removing it to avoid losing items.

    Why Choose THE TRAVELER’S BACKPACK ADDON?

    There are countless Minecraft addons available, but this one stands out because of its practicality and ease of use. Here’s why it’s worth trying:

    • Perfect for players who love exploring.
    • Compatible with Minecraft Bedrock 1.21 and future updates like Minecraft addons 2025.
    • Works seamlessly alongside other popular addons like Minecraft naturalist addons and Minecraft natural addons.

    Tips for Using THE TRAVELER’S BACKPACK ADDON

    • Organize your inventory: Use the extra slots to separate tools, food, and resources for easy access.
    • Combine with other addons: Pair this addon with other inventory or exploration-focused addons for an even better experience.
    • Backup your worlds: Always back up your Minecraft worlds before adding new behavior or resource packs to avoid any potential issues.

    Conclusion

    THE TRAVELER’S BACKPACK ADDON for BEDROCK 1.21 is a must-have for any Minecraft player who loves exploring and hates running out of inventory space. Its intuitive features, ease of use, and compatibility with Minecraft Bedrock make it an essential addition to your gameplay.

    Download the addon here and take your Minecraft adventures to the next level. Happy exploring!


  • THE TREE CHOP and CAPITATOR ADDON for BEDROCK 1.21

    THE TREE CHOP and CAPITATOR ADDON for BEDROCK 1.21

    THE TREE CHOP and CAPITATOR ADDON for BEDROCK 1.21

    Have you ever felt frustrated chopping down trees in Minecraft, block by block? What if there was a way to cut down entire trees in seconds? The TREE CHOP and CAPITATOR ADDON for BEDROCK 1.21 is here to save you time and effort! This incredible addon transforms the way you gather wood, making the process faster, easier, and more satisfying. Let’s explore why this is one of the best Minecraft Bedrock addons for players who love efficiency.

    What is the Tree Chop and Capitator Addon?

    The Tree Chop and Capitator Addon is a game-changing tool designed for Minecraft Bedrock 1.21. It allows players to chop down an entire tree simply by breaking its base block. This addon replicates the functionality of popular Java mods, bringing the same convenience and realism to Minecraft Bedrock Edition.

    Instead of spending time breaking every block of a tree, you’ll only need one swing of your axe. It’s perfect for players who want to focus on building, exploring, or surviving without wasting precious time on repetitive tasks.

    Features of the Tree Chop and Capitator Addon

    This addon isn’t just about convenience—it also includes features that enhance your Minecraft experience. Here’s what makes it so special:

    Full Tree Removal with One Swing

    With this addon, breaking the bottom block of a tree will automatically cause the entire tree to fall. Say goodbye to floating tree tops! This feature is not only efficient but also adds a layer of realism to your world.

    Works with All Types of Trees

    The Tree Chop and Capitator Addon works with every type of tree in Minecraft Bedrock. Whether you’re chopping oak, birch, spruce, or jungle trees, the addon ensures the entire tree comes down in one go.

    Tool Compatibility

    This addon is designed to work seamlessly with axes, enhancing their utility. While axes are the main tools for chopping trees, the addon ensures their durability decreases appropriately, keeping the gameplay balanced.

    Realistic Physics

    When you chop a tree, the logs and leaves fall naturally, making the experience feel immersive and satisfying. It’s a small detail, but it adds a lot of fun to your gameplay.

    Why Use the Tree Chop and Capitator Addon?

    Efficiency is key in Minecraft, especially in survival mode. The Tree Chop and Capitator Addon saves you time by making wood gathering faster and easier. Whether you’re building a massive structure or gathering resources to survive the night, this addon ensures you spend less time chopping and more time enjoying the game.

    Additionally, this addon is beginner-friendly, meaning players of all ages and skill levels can use it. Its simplicity makes it a must-have for players looking to enhance their Minecraft experience.

    How to Install the Tree Chop and Capitator Addon

    Installing the TREE CHOP and CAPITATOR ADDON for BEDROCK 1.21 is quick and easy. Follow these steps:

    1. Download the Addon: First, download the addon from this link: Tree Capitator Addon Download. The file will be in .mcaddon format.

    1. Open Minecraft Bedrock 1.21: Ensure you have the latest version of Minecraft Bedrock installed on your device.
    2. Import the Addon: Once the file is downloaded, click on it, and Minecraft will automatically import the addon into the game.
    3. Activate the Addon:
      • Go to the world settings for the world where you want to use the addon.
      • Navigate to the Behavior Packs section and activate the Tree Chop and Capitator Addon.
      • Do the same under Resource Packs to ensure all features are enabled.
    4. Start Playing: Once activated, load your world and start chopping trees like never before!

    THE BEST MINECRAFT COMMUNITY?

    ¡Join to MINECOMUNIDAD.COM  DISCORD! (Mods, Shaders, Servers, Etc)

    ¡Join now!

    How to Deactivate the Addon

    If you ever want to deactivate the addon, it’s just as easy:

    1. Open World Settings: Go to the settings of your Minecraft world.
    2. Remove the Addon: In the Behavior Packs and Resource Packs sections, find the Tree Chop and Capitator Addon and deactivate it.
    3. Reload Your World: Your world will return to its default settings, with the regular tree-chopping mechanics restored.

    Tips for Using the Tree Chop and Capitator Addon

    Here are some tips to make the most out of this addon:

    • Use Better Axes: The addon still respects tool durability, so using higher-tier axes like iron or diamond ensures you can chop down more trees without constantly repairing or replacing your tools.
    • Plan Your Builds: With wood-gathering made easy, you can focus more on building complex structures or exploring new areas.
    • Clear Forests Quickly: Need a lot of space for your next project? This addon makes clearing entire forests a breeze!

    Final Thoughts

    The TREE CHOP and CAPITATOR ADDON for BEDROCK 1.21 is a must-have for players who want to streamline their wood-gathering process. By allowing you to chop down entire trees with a single swing, it saves time, enhances gameplay, and brings a touch of realism to Minecraft Bedrock Edition.

    Whether you’re a survivalist looking to optimize your workflow or a builder in need of large amounts of wood, this addon is the perfect solution. Download it today and experience the joy of efficient tree-chopping in Minecraft!

    Ready to get started? Grab the addon from this link and revolutionize your Minecraft gameplay!

  • THE BEST NATURALIST ADDON for BEDROCK 1.21 

    THE BEST NATURALIST ADDON for BEDROCK 1.21 

    THE BEST NATURALIST ADDON for BEDROCK 1.21

    If you’re a fan of Minecraft and love exploring the world around you, you’re in for a treat. Have you ever wanted to experience nature in Minecraft like never before? The BEST NATURALIST ADDON for BEDROCK 1.21 is just what you need. Imagine encountering real-life animals, new plant life, and exciting natural features all within your Minecraft world. This addon takes your gameplay to the next level by adding a whole new level of realism to the game. Let’s dive in and discover what makes it the perfect addition for Minecraft 1.21!

    What is the Naturalist Addon?

    The Naturalist Addon is an enhancement for Minecraft Bedrock, specifically designed for version 1.21. It focuses on adding natural elements to your game, such as animals, plants, and environmental features, that closely resemble real-life counterparts. With this addon, Minecraft becomes a much more immersive world, where you can witness the beauty of nature right in your own virtual backyard.

    In Minecraft Bedrock, the world feels vast, but it can sometimes lack the small, fine details that make nature feel alive. The Naturalist Addon changes that by introducing a variety of plants, wildlife, and other natural features to make the environment more vibrant and dynamic. It’s perfect for players who want to feel more connected to the world around them.

    Features of the Best Naturalist Addon for Bedrock 1.21

    The Naturalist Addon includes several exciting features that make it stand out from other Minecraft addons. Here are some of the best ones:

    Real-Life Animals

    One of the standout features of the addon is its addition of real-life animals. From birds to deer, to more exotic creatures, the Naturalist Addon brings a variety of animals that make the world feel more alive. These animals follow natural behavior patterns, adding a sense of realism to your gameplay.

    Unique Plants and Flora

    Another major addition is the plants. This addon adds a variety of new plants and flora, including trees, flowers, and shrubs, which contribute to the environment’s beauty and richness. The plants blend seamlessly into Minecraft’s natural landscape, making it feel as though they were always part of the game.

    Enhanced Biomes

    The Naturalist Addon doesn’t just add individual animals or plants—it enhances entire biomes. Expect to see new features in your favorite biomes, making them feel more diverse and engaging. Whether you’re in the forest, desert, or plains, each area will feel more alive and diverse.

    How to Install the Naturalist Addon in Minecraft Bedrock 1.21

    Getting the BEST NATURALIST ADDON for BEDROCK 1.21 is simple, and in just a few steps, you’ll be ready to explore the new features. Here’s how to install it:

    1. Download the Addon: First, download the addon from the link provided: Naturalist Addon Download. This file will be in .mcaddon format.

    1. Open Minecraft Bedrock 1.21: Launch Minecraft on your device and make sure you’re on the Bedrock 1.21 version.
    2. Import the Addon: Once the download is complete, open the .mcaddon file. Minecraft will automatically prompt you to import the addon.
    3. Activate the Addon: After importing, go to the Settings of your world and navigate to the Behavior Packs section. Find the Naturalist Addon and activate it.
    4. Play and Explore: Once the addon is activated, load into your world, and you’ll start seeing the new animals, plants, and features right away. Take some time to explore the changes and enjoy the newly enriched environment!

    THE BEST MINECRAFT COMMUNITY?

    ¡Join to MINECOMUNIDAD.COM  DISCORD! (Mods, Shaders, Servers, Etc)

    ¡Join now!

    How to Deactivate the Naturalist Addon

    If you ever want to turn off the Naturalist Addon, the process is just as simple:

    1. Open Your World Settings: Go to the settings for your Minecraft world.
    2. Navigate to Behavior Packs: Under the Behavior Packs tab, find the Naturalist Addon.
    3. Deactivate: Simply remove or deactivate the addon. Your world will revert to its original state, without the new animals or plants.

    Why You Should Try the Naturalist Addon for Minecraft 1.21

    If you’re looking for ways to enhance your Minecraft Bedrock experience, this addon is a must-try. The Naturalist Addon brings realistic animals, vibrant plants, and detailed biomes that make Minecraft feel more like a living, breathing world. Whether you’re a nature enthusiast or just looking for something new in your game, this addon offers a fantastic opportunity to explore the beauty of nature in a way that Minecraft has never done before.

    Moreover, with the ever-evolving world of Minecraft addons and constant updates for Minecraft 1.21, the Naturalist Addon is sure to keep things fresh. It’s compatible with future updates, including Minecraft Addons 2025, ensuring that you’ll get the most out of your gaming experience.

    Final Thoughts

    In conclusion, if you’re wondering about THE BEST NATURALIST ADDON for BEDROCK 1.21, look no further. This addon is the perfect way to add a touch of realism and natural beauty to your Minecraft world. Its wide variety of animals, plants, and enhanced biomes will bring your game to life in ways you never imagined.

    Ready to get started? Download the Naturalist Addon from the link provided and begin your journey into a more natural Minecraft experience today!

  • Cómo SUBIR los FPS en MINECRAFT POJAVLAUNCHER 2025

    Cómo SUBIR los FPS en MINECRAFT POJAVLAUNCHER 2025

    Cómo SUBIR los FPS en MINECRAFT POJAVLAUNCHER 2025

    ¿Te gustaría mejorar la fluidez de tu juego en Minecraft POJAVLAUNCHER? Si has notado que el rendimiento de tu juego no es el óptimo, no te preocupes, ¡te tenemos cubierto! En este artículo te enseñaremos cómo subir los FPS en Minecraft POJAVLAUNCHER 2025 para que puedas disfrutar de una experiencia mucho más fluida y sin retrasos. La clave está en instalar y configurar OptiFine, una herramienta esencial para mejorar el rendimiento de Minecraft en dispositivos móviles, ¡y aquí te explicamos cómo hacerlo!

    ¿Por qué es importante mejorar los FPS en Minecraft POJAVLAUNCHER?

    El FPS (Frames Per Second) en Minecraft es crucial para garantizar una experiencia de juego fluida y sin lags. Cuando juegas con un bajo número de FPS, puedes experimentar retrasos, movimientos entrecortados y una sensación de que el juego no responde bien. Esto es especialmente problemático si estás usando Minecraft POJAVLAUNCHER en dispositivos Android o iOS, que suelen tener hardware más limitado en comparación con las PC.

    Subir los FPS de Minecraft POJAVLAUNCHER mejora la jugabilidad, permite una mayor estabilidad y reduce el consumo innecesario de recursos del dispositivo. A continuación, te mostramos cómo lograrlo.

    Paso 1: Instalar OptiFine para Minecraft POJAVLAUNCHER

    Uno de los métodos más efectivos para mejorar los FPS en Minecraft POJAVLAUNCHER es usar OptiFine, una modificación que optimiza el rendimiento de Minecraft. OptiFine te permite personalizar diversos parámetros gráficos y optimizar la experiencia de juego para obtener el máximo rendimiento. Aquí te mostramos cómo instalarlo.

    ¿Cómo descargar OptiFine?

    1. Visita la página oficial de OptiFine: OptiFine Downloads.
    2. Elige la versión más reciente de OptiFine compatible con Minecraft POJAVLAUNCHER 2025.
    3. Haz clic en el enlace de descarga y espera a que se descargue el archivo en tu dispositivo.

    ¿UNA COMUNIDAD DE MINECRAFT EN ESPAÑOL?

    ¡Entra a la COMUNIDAD DE MINECRAFT de Discord! (Mods, Shaders, Servers, Etc)

    ¡Entra ahora!

    ¿Cómo instalar OptiFine en POJAVLAUNCHER?

    1. Abre POJAVLAUNCHER en tu dispositivo.
    2. Dirígete a la configuración del launcher y busca la opción para instalar un «mod».
    3. Selecciona el archivo de OptiFine que descargaste y haz clic en «Instalar».
    4. Una vez que la instalación se complete, reinicia POJAVLAUNCHER y abre Minecraft. Verás que OptiFine ha sido instalado correctamente.

    Paso 2: Configuración de OptiFine para mejorar los FPS

    Una vez que OptiFine esté instalado, es hora de configurar los ajustes para maximizar el rendimiento de Minecraft POJAVLAUNCHER. A continuación, te mostramos cómo hacerlo.

    Ajustes gráficos de OptiFine

    1. Ajusta la distancia de renderizado: La distancia de renderizado determina cuán lejos puedes ver los objetos en tu mundo. Reducir la distancia de renderizado puede mejorar los FPS.
      • Ve a «Opciones» > «Gráficos» > «Distancia de renderizado».
      • Configura la distancia a 2-4 chunks si necesitas mejorar los FPS.
    2. Desactivar las sombras: Las sombras realistas consumen muchos recursos, por lo que desactivarlas puede mejorar considerablemente el rendimiento.
      • En «Opciones» > «Gráficos» > «Sombras», selecciona «Desactivado».
    3. Ajustes de calidad: OptiFine permite ajustar varios parámetros gráficos. Para aumentar los FPS, ajusta los siguientes:
      • Texturas: Configura las texturas en «Bajas» o «Mínimas».
      • Gráficos: Ajusta la opción de «Gráficos» a «Rápido» en lugar de «Suavizado».
      • MIPMAP: Desactiva las opciones de Mipmap si necesitas mejorar el rendimiento.
    4. Activar FPS Boost: Dentro de la configuración de OptiFine, puedes activar un modo de optimización de FPS.
      • En «Opciones» > «Gráficos» > «Rendimiento», asegúrate de activar la opción «FPS Boost».

    Otros ajustes en POJAVLAUNCHER

    • Cierra aplicaciones en segundo plano: Asegúrate de cerrar otras aplicaciones que puedan estar consumiendo recursos mientras juegas Minecraft. Esto permitirá que tu dispositivo dedique más potencia al juego.
    • Reduce la resolución del juego: Si los FPS siguen siendo bajos, considera reducir la resolución en el menú de opciones gráficas de Minecraft POJAVLAUNCHER.

    Paso 3: Prueba y ajustes adicionales

    Una vez que hayas realizado los ajustes anteriores, ¡es hora de probar el juego! Si aún experimentas bajos FPS, intenta realizar los siguientes pasos:

    1. Reinicia el dispositivo: A veces, un simple reinicio puede mejorar el rendimiento general del juego.
    2. Actualiza los controladores gráficos: Si tu dispositivo tiene actualizaciones disponibles para sus controladores gráficos, instálalas, ya que pueden mejorar el rendimiento de Minecraft.

    Conclusión

    Subir los FPS en Minecraft POJAVLAUNCHER 2025 es posible si sigues los pasos adecuados. OptiFine es una herramienta increíblemente eficaz para mejorar el rendimiento de Minecraft en dispositivos móviles. Con los ajustes correctos, podrás disfrutar de una experiencia de juego mucho más fluida, reduciendo los lags y mejorando la estabilidad de tu mundo.

    Recuerda seguir cada paso con calma, realizar las configuraciones adecuadas y probar los cambios para obtener el mejor rendimiento. ¡Ahora estás listo para jugar Minecraft POJAVLAUNCHER de manera más fluida y sin interrupciones!

  • TOP MEJORES MODS DE DEDSAFIO 3

    TOP MEJORES MODS DE DEDSAFIO 3

    TOP MEJORES MODS DE DEDSAFIO 3

    Si eres fan de Minecraft Dedsafio 3, seguramente quieres disfrutar de una experiencia única y llena de sorpresas. Los mods son una de las mejores maneras de mejorar tu juego, ya sea agregando nuevos objetos, criaturas o modificando la jugabilidad. En este artículo te presentaremos los TOP MEJORES MODS DE DEDSAFIO 3 que puedes descargar y agregar a tu mundo de Minecraft. ¡Prepárate para descubrirlos todos!

    ¿Qué son los Mods de Minecraft Dedsafio 3?

    Los mods son modificaciones creadas por la comunidad que alteran y mejoran varios aspectos del juego. En Minecraft Dedsafio 3, los mods permiten a los jugadores agregar nuevas mecánicas, personajes, y funcionalidades que hacen el juego mucho más dinámico y entretenido. A continuación, te mostramos una lista de los mejores mods para Minecraft Dedsafio 3.

    ¿Cómo activar y desactivar los Mods?

    Activar y desactivar estos mods es muy fácil. Solo tienes que seguir estos pasos:

    1. Descargar el mod: Utiliza los enlaces proporcionados para descargar los mods.
    2. Instalar el mod: Abre el archivo descargado y Minecraft instalará el mod automáticamente.
    3. Activar el mod: Entra en Minecraft, ve a «Ajustes» > «Paquete de Recursos» y activa el mod desde allí.
    4. Desactivar el mod: Si deseas desactivarlo, simplemente desactívalo en los mismos ajustes.

    TOP MEJORES MODS DE DEDSAFIO 3

    Aquí tienes una lista con los 19 mejores mods para Minecraft Dedsafio 3, junto con sus enlaces para que puedas descargarlos fácilmente.

    1. Add-on Casino v1 (Beta)

    Este mod agrega un casino con ruletas, tragamonedas y más. Es ideal para añadir un toque de azar a tu mundo de Minecraft.

    2. Add-on Botones y Puertas Insta

    Este mod mejora la jugabilidad de las puertas y botones, haciéndolos más funcionales y rápidos.

    3. Momento Revill

    Un mod que introduce mecánicas de acción y sorpresas, ideal para los jugadores que buscan desafíos impredecibles.

    4. Momento Nutria Dedsafio 3

    Este mod trae nuevas criaturas y mecánicas relacionadas con las nutrias, añadiendo un toque divertido a tu mundo de Minecraft.

    5. Bug Fix Ruleta

    Soluciona problemas con la ruleta en Minecraft Dedsafio 3, asegurando una experiencia más estable y sin errores.

    6. Ruleta Dedsafio 3 BP

    Este mod agrega una ruleta completamente funcional a tu mundo, añadiendo nuevos desafíos para los jugadores.

    7. Skins Custom del Dedsafio

    Permite personalizar tus skins de manera exclusiva, basados en Minecraft Dedsafio 3.

    8. DEDSAFIO 3 – By TheNeitorLoL

    Este mod agrega características y objetos únicos creados por TheNeitorLoL para mejorar tu experiencia en Minecraft Dedsafio 3.

    9. Ender Bundle

    Añade un nuevo sistema de almacenamiento que permite organizar tus recursos de manera más eficiente.

    10. Droplight Multi-Language

    Este mod introduce un sistema de luces dinámicas, compatible con varios idiomas, para mejorar la visibilidad en tu mundo.

    11. Fantasma Rojo Dedsafio 3 (Spawn Natural)

    Este mod añade un nuevo fantasma al juego, creando un reto extra para los jugadores.

    12. Bomba Voladora Dedsafio 3 (Spawn Natural)

    Añade bombas voladoras que puedes usar en tu mundo, agregando más dinamismo y acción.

    13. Raiyons Dynamic Light Addon

    Este mod mejora el sistema de iluminación en Minecraft, proporcionando luces dinámicas que cambian dependiendo de tu entorno.

    14. The Forgotten Mobs

    Introduce nuevas criaturas al juego, basadas en mobs olvidados de versiones anteriores de Minecraft.

    15. UI Dark Basement

    Este mod cambia la interfaz del juego, dándole un estilo más oscuro y moderno a la UI.

    16. Mob de Dedsafio 3 Fase 1

    Agrega nuevos mobs que pertenecen a la primera fase de Minecraft Dedsafio 3, aumentando la dificultad del juego.

    17. Tótem Nutria

    Este mod agrega un tótem inspirado en la nutria, que tiene efectos únicos dentro del juego.

    18. Portal Gun Addon

    Un mod imprescindible para los jugadores que disfrutan de la mecánica de portales. Te permite crear portales para moverte rápidamente por el mundo.

    19. Redstone Buildcraft Addon

    Este mod te permite utilizar mecanismos de redstone para crear estructuras automáticas en tu mundo de Minecraft Dedsafio 3.

    Mods Extra de Sorpresa

    Si te has quedado con ganas de más, aquí tienes 6 mods extra que no puedes dejar pasar:

    1. Mod Extra 1
      Creador: SirDrogs
    2. Mod Extra 2
    3. Mod Extra 3 / Behavior XD07
    4. The Forgotten Mobs
    5. Conflictic Honor Addon
    6. Mythological Craft Addon

    ¿UNA COMUNIDAD DE MINECRAFT EN ESPAÑOL?

    ¡Entra a la COMUNIDAD DE MINECRAFT de Discord! (Mods, Shaders, Servers, Etc)

    ¡Entra ahora!

    Conclusión

    Si eres un jugador de Minecraft Dedsafio 3, estos mods son perfectos para enriquecer tu experiencia de juego. Desde nuevas criaturas hasta mecánicas innovadoras, los mods de Dedsafio 3 te ofrecen una amplia variedad de opciones para disfrutar aún más de Minecraft. ¡No esperes más y comienza a probar todos estos mods para hacer de tu mundo de Minecraft algo único y emocionante!

  • COMO DESCARGAR COMPLEMENTARY SHADERS PARA MCPE 1.21

    COMO DESCARGAR COMPLEMENTARY SHADERS PARA MCPE 1.21

    COMO DESCARGAR COMPLEMENTARY SHADERS PARA MCPE 1.21

    Si eres un jugador de Minecraft PE 1.21 y buscas mejorar los gráficos de tu mundo con efectos visuales impresionantes, los Complementary Shaders son una excelente opción. Este artículo te guiará paso a paso sobre COMO DESCARGAR COMPLEMENTARY SHADERS PARA MCPE 1.21 y cómo activarlos en tu dispositivo Android. Sigue leyendo y transforma tu experiencia de juego con estos shaders de calidad, que aportan mejoras en la iluminación, sombras, reflejos y mucho más.

    ¿Qué son los Complementary Shaders para Minecraft PE 1.21?

    Los Complementary Shaders son un conjunto de modificaciones gráficas que alteran la apariencia de Minecraft Bedrock. Este shader mejora la iluminación, las sombras y otros efectos visuales del juego, haciéndolo más realista y atractivo sin sobrecargar el rendimiento de tu dispositivo. Si deseas un cambio visual impresionante, los Complementary Shaders para MCPE 1.21 son una opción ideal, ya que proporcionan una experiencia más envolvente y dinámica.

    Ventajas de usar Complementary Shaders en Minecraft PE 1.21

    • Mejoras visuales sin sacrificar el rendimiento: A diferencia de otros shaders que requieren dispositivos de gama alta, Complementary Shaders está optimizado para funcionar bien incluso en teléfonos Android de gama media.
    • Efectos realistas: Gracias a sus mejoras en iluminación, sombras, agua y cielo, los gráficos de tu mundo se verán más detallados y vívidos.
    • Fácil de instalar y usar: Los Complementary Shaders son fáciles de descargar y no requieren configuraciones complicadas para ser activados en Minecraft PE 1.21.

    ¿Dónde descargar Complementary Shaders para MCPE 1.21?

    Descargar Complementary Shaders para MCPE 1.21 es sencillo y rápido. A continuación te mostramos cómo obtener el shader y qué pasos seguir para añadirlo a tu juego:

    1. Descargar Complementary Shaders

    Para comenzar, sigue estos sencillos pasos para descargar los shaders:

    1. Dirígete al sitio web de MCPE DL donde podrás encontrar el archivo necesario: Newb Complementary Shader.
    2. Haz clic en el enlace de descarga para obtener el archivo .mcpack de los Complementary Shaders.
    3. El archivo se descargará automáticamente en tu dispositivo Android.

    2. Instalar Complementary Shaders

    Una vez que hayas descargado el archivo .mcpack, es hora de instalarlo en Minecraft PE 1.21:

    1. Abre Minecraft PE en tu dispositivo.
    2. Dirígete a Configuración.
    3. En la sección de Recursos Globales, selecciona Agregar paquete.
    4. Busca el archivo descargado y selecciónalo. El archivo se importará automáticamente a Minecraft.
    5. Ahora, ve a la sección de Recursos Globales y selecciona Complementary Shaders para activarlos.

    3. Activar los Complementary Shaders

    Para activar los Complementary Shaders en tu mundo de Minecraft PE 1.21, sigue estos pasos:

    1. Abre Minecraft PE y carga el mundo en el que quieres usar los shaders.
    2. Una vez en el mundo, ve a la configuración del juego.
    3. En la opción Paquete de Recursos, selecciona Complementary Shaders.
    4. Asegúrate de que esté activado en los Recursos Globales.
    5. Ahora disfruta de las mejoras gráficas en tu mundo de Minecraft PE.

    4. Desactivar los Complementary Shaders

    Si en algún momento deseas desactivar los shaders, solo sigue estos pasos:

    1. Ve a la Configuración de tu mundo.
    2. En Paquete de Recursos, selecciona Eliminar.
    3. Los Complementary Shaders serán desactivados y el mundo volverá a su aspecto original.

    ¿UNA COMUNIDAD DE MINECRAFT EN ESPAÑOL?

    ¡Entra a la COMUNIDAD DE MINECRAFT de Discord! (Mods, Shaders, Servers, Etc)

    ¡Entra ahora!

    ¿Es necesario un dispositivo potente para usar los Complementary Shaders?

    Una de las grandes ventajas de los Complementary Shaders para MCPE 1.21 es que no requieren un dispositivo de gama alta para funcionar. Este shader está optimizado para ofrecer mejoras gráficas en dispositivos con especificaciones medias y bajas. Sin embargo, si experimentas lag o caídas de rendimiento, puedes ajustar la configuración de gráficos dentro del juego para mejorar la experiencia.

    Consejos para mejorar el rendimiento al usar Complementary Shaders

    Aunque los Complementary Shaders están diseñados para ser livianos, algunos jugadores pueden experimentar una ligera disminución en el rendimiento en dispositivos más antiguos. Aquí tienes algunos consejos para optimizar el rendimiento:

    1. Reduce la distancia de visión: Ve a la configuración de Gráficos y ajusta la distancia de visión para reducir la carga en el procesador.
    2. Desactiva los efectos de partículas: En la configuración, desactiva las partículas o reduce su intensidad para mejorar la tasa de fotogramas.
    3. Usa el modo de bajo rendimiento: Algunos dispositivos permiten activar un modo de gráficos reducidos para mejorar el rendimiento al usar shaders.

    Conclusión

    Ahora que sabes COMO DESCARGAR COMPLEMENTARY SHADERS PARA MCPE 1.21, puedes empezar a disfrutar de una experiencia visual mejorada en Minecraft PE. Estos shaders son fáciles de instalar, y te proporcionarán una atmósfera más realista y vibrante, todo sin sacrificar el rendimiento de tu dispositivo. Si buscas una forma sencilla de mejorar la apariencia de tu mundo en Minecraft, los Complementary Shaders son la opción perfecta.

  • Cómo Descargar los Pack de Texturas de Minecraft PS4 Edition

    Cómo Descargar los Pack de Texturas de Minecraft PS4 Edition

    Cómo Descargar los Pack de Texturas de Minecraft PS4 Edition en Minecraft PS4 Bedrock

    ¿Te has preguntado alguna vez cómo puedes trasladar tus pack de texturas favoritos de Minecraft PS4 Edition a Minecraft PS4 Bedrock? Aunque ambos juegos se juegan en la misma consola, la transición de contenido entre versiones puede parecer un poco complicada. En este artículo, te explicaré cómo puedes tener esos pack de texturas en la versión Bedrock de Minecraft para PS4, asegurándote de que tu experiencia de juego se mantenga igual de increíble.

    ¿Qué Son los Pack de Texturas en Minecraft?

    Antes de sumergirnos en el proceso, es esencial entender qué son los pack de texturas. En Minecraft, los pack de texturas cambian la apariencia de los bloques, elementos y criaturas en el juego. Puedes usar estos pack para personalizar tu mundo y hacerlo más atractivo visualmente. Los pack de texturas pueden variar desde cambios sutiles hasta transformaciones completas del estilo gráfico del juego.

    ¿Cuál es la Diferencia Entre Minecraft PS4 Edition y Minecraft PS4 Bedrock?

    La Minecraft PS4 Edition y Minecraft PS4 Bedrock son dos versiones diferentes del juego. La edición PS4 fue la versión original, mientras que la edición Bedrock es una versión más reciente y unificada que permite la compatibilidad cruzada con otras plataformas, como Windows, Xbox y Switch. Los pack de texturas diseñados para la edición PS4 no siempre son directamente compatibles con la edición Bedrock, pero es posible trasladarlos con algunos pasos adicionales.

    Pasos para Descargar los Pack de Texturas de Minecraft PS4 Edition en Minecraft PS4 Bedrock

    1. Compra o Descarga Gratis los Pack de Texturas

    Para usar un pack de texturas en Minecraft PS4 Bedrock, primero necesitas asegurarte de tener el pack que deseas. Los pack de texturas disponibles para la edición PS4 se pueden comprar o descargar desde el mercado de Minecraft o desde tiendas en línea. Asegúrate de que el pack de texturas esté disponible en formato compatible con la edición Bedrock.

    2. Accede al Mercado de Minecraft en la Edición Bedrock

    1. Inicia Minecraft PS4 Bedrock: Abre el juego en tu PS4.
    2. Dirígete al Mercado: Desde la pantalla principal, selecciona el ícono de la tienda, que te llevará al Mercado de Minecraft.
    3. Busca el Pack de Texturas: Usa la barra de búsqueda para encontrar el pack de texturas que deseas. Si el pack de texturas de la edición PS4 está disponible para Bedrock, podrás encontrarlo aquí.

    3. Compra e Instala el Pack de Texturas

    1. Compra el Pack de Texturas: Si el pack de texturas es de pago, completa la compra usando los métodos de pago disponibles.
    2. Descarga el Pack: Una vez que hayas comprado el pack, descárgalo directamente desde el Mercado.
    3. Instala el Pack: Después de la descarga, el pack de texturas se instalará automáticamente en tu juego.

    4. Aplica el Pack de Texturas en el Juego

    1. Accede a las Configuraciones del Juego: Desde el menú principal de Minecraft PS4 Bedrock, selecciona «Opciones» y luego «Configuración de Video».
    2. Selecciona «Paquete de Textura»: Aquí podrás ver todos los pack de texturas instalados.
    3. Activa el Pack de Texturas: Selecciona el pack de texturas que acabas de instalar y aplícalo a tu juego.

    5. Verifica la Aplicación del Pack de Texturas

    1. Crea o Abre un Mundo: Inicia un nuevo mundo o abre uno existente para ver cómo se aplican las nuevas texturas.
    2. Revisa las Texturas: Asegúrate de que las texturas se vean como esperabas. Si hay algún problema, revisa los pasos anteriores o considera volver a instalar el pack.

    Solución de Problemas Comunes

    Pack de Texturas No Disponible

    Si no encuentras el pack de texturas en el Mercado de Minecraft, puede que el pack no esté disponible para la versión Bedrock. En este caso, puedes buscar alternativas o packs similares diseñados para Bedrock.

    Problemas de Instalación

    Si encuentras problemas al instalar el pack, asegúrate de que tu juego esté actualizado a la última versión. A veces, los problemas de compatibilidad pueden ser solucionados con una actualización.

    Texturas No Aplicadas Correctamente

    Si el pack de texturas no se aplica correctamente, intenta reiniciar Minecraft o incluso tu PS4. A veces, reiniciar el juego puede solucionar problemas temporales de aplicación de texturas.

    Consejos Adicionales

    Explora Nuevos Packs de Texturas

    Además de trasladar tus packs favoritos, explora nuevos packs en el Mercado de Minecraft. Hay una gran variedad de opciones disponibles que pueden darle un nuevo aspecto a tu juego.

    Mantén tu Juego Actualizado

    Asegúrate de mantener Minecraft PS4 Bedrock actualizado para evitar problemas de compatibilidad con nuevos packs de texturas y otros contenidos.

    Consulta la Comunidad

    Si tienes problemas o preguntas adicionales, consulta la comunidad de Minecraft en foros o redes sociales. A menudo, otros jugadores pueden ofrecer soluciones útiles.

    Descargar Pack de Texturas

    Si lo que quieres es descargar pack de texturas para PS4 Edition es muy sencillo y lo podrás hacer a continuación.

    Conclusión

    Tener los pack de texturas de Minecraft PS4 Edition en Minecraft PS4 Bedrock puede ser un proceso sencillo si sigues los pasos adecuados. Desde la compra e instalación hasta la aplicación de las texturas en tu juego, cada paso es importante para asegurarte de que disfrutes de una experiencia de juego visualmente enriquecida. Siguiendo esta guía, estarás listo para transformar tu mundo de Minecraft con tus texturas favoritas.